
Keycloak is an open-source software product to allow single sign-on with identity and access management aimed at modern applications and services.
As organizations increasingly adopt cloud-based solutions and microservices architectures, the need for robust identity management systems has become paramount. Keycloak addresses this need by providing a comprehensive suite of features that simplify the authentication process while enhancing security.
With Keycloak, developers can add authentication to their applications and secure services with minimal effort. One of the standout features of Keycloak is its ability to handle user management without the need for developers to store or authenticate users directly. This is particularly beneficial for organizations looking to streamline their authentication processes while maintaining a high level of security.
When backend APIs utilize Keycloak as an Identity Provider, they can leverage the OpenID Connect protocol, which is an authentication layer built on top of OAuth 2.0. In this scenario, you can use OAuth credentials to grant access to Posts Bridge to your APIs as an authenticated user.
In this tutorial we will show an example on how to configure a Keycloak OAuth 2.0 client to grant Posts Bridge access to third party resources based on the plugin’s OAuth credentials.
Keycloak setup
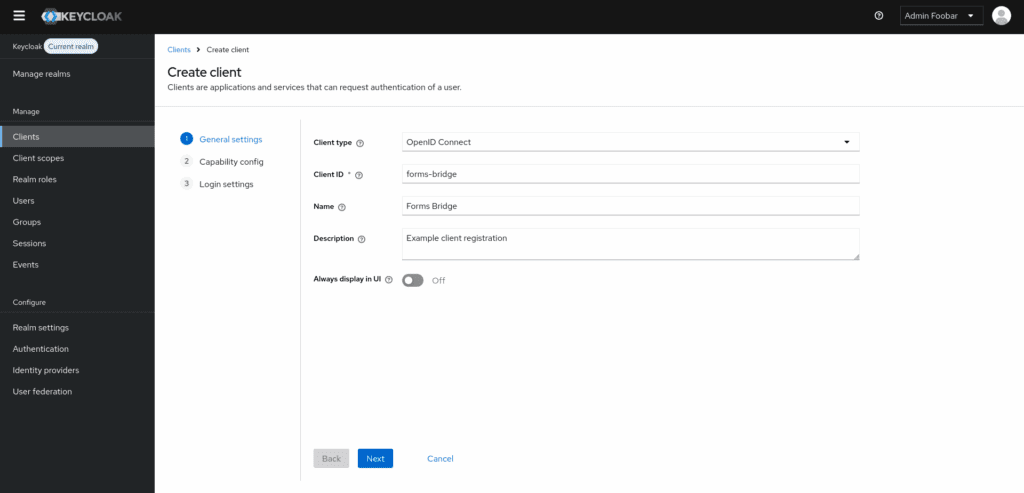
1. Create a client: Begin by navigating to the Clients section in the realm settings and clicking on Create. Enter a unique Client ID (e.g., posts-bridge) and select OpenID Connect as the protocol.
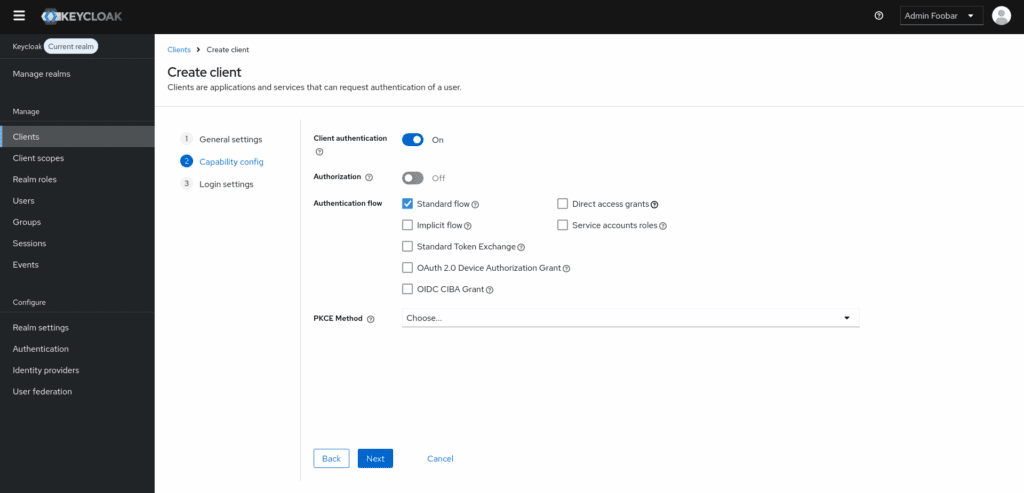
2. Set client settings: Configure additional settings such as Access Type (choose confidential for server-side apps), Client Authentication, and Authorization Settings as per your application’s requirements.
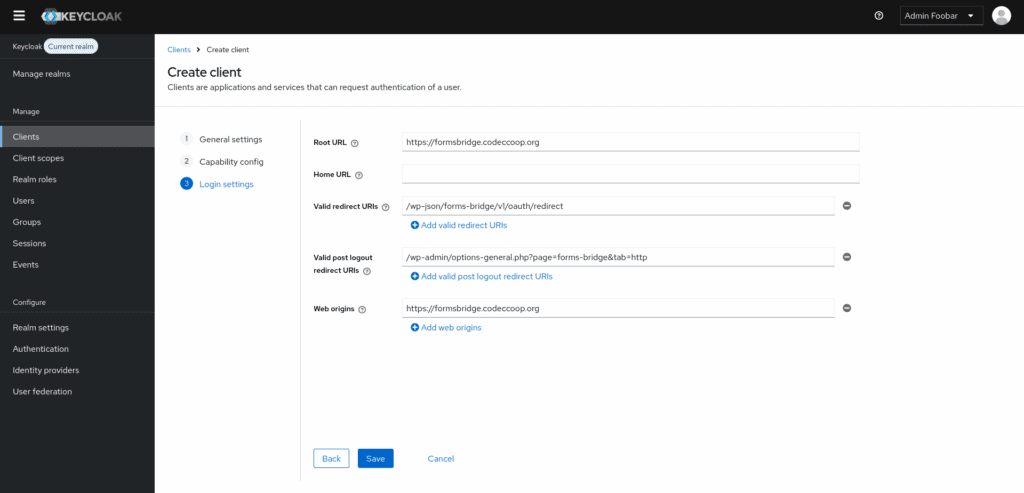
3. Configure redirect URIs: Enter your WordPress domain as the Root URL of the client and specify /wp-json/posts-bridge/v1/oauth/redirect as a Valid Redirect URI. This step is crucial for ensuring that the authentication flow works seamlessly.
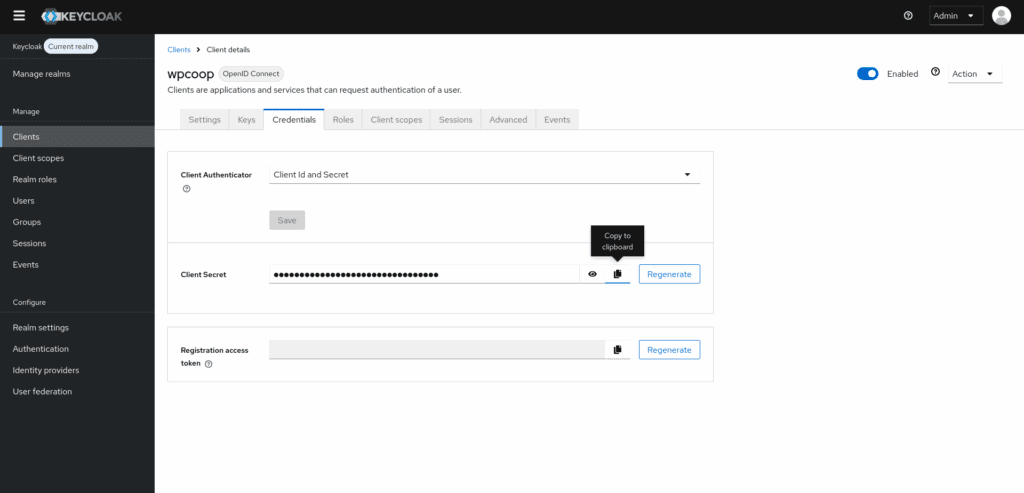
4. Get the client secret: After saving the client, Keycloak will generate a Client Secret. You can retrieve this from the Credentials tab, which is essential for securing your application.
5. Increase refresh tokens lifespan: These configurations, found on the Advanced tab, control the lifespan of issued refresh tokens. Setting these values high enough will help avoid expiration issues, ensuring that your application maintains access to the APIs.
6. Increase access token lifespan: By default, the access token lifespan is set to a relatively short duration. Adjusting this value can significantly improve the performance of your integration, as it reduces the frequency of token refresh requests.

7. Create a user: To conclude the setup you have to create a user in the client’s realm. During the authorization request flow, Keycloak will require a user login to identify Posts Bridge. Navigate to the Users section in the Admin Console and create user. Once created, you have to set its password on the user’s Credentials tab. Store the username and password as it will be required on the following steps.
Posts Bridge set up
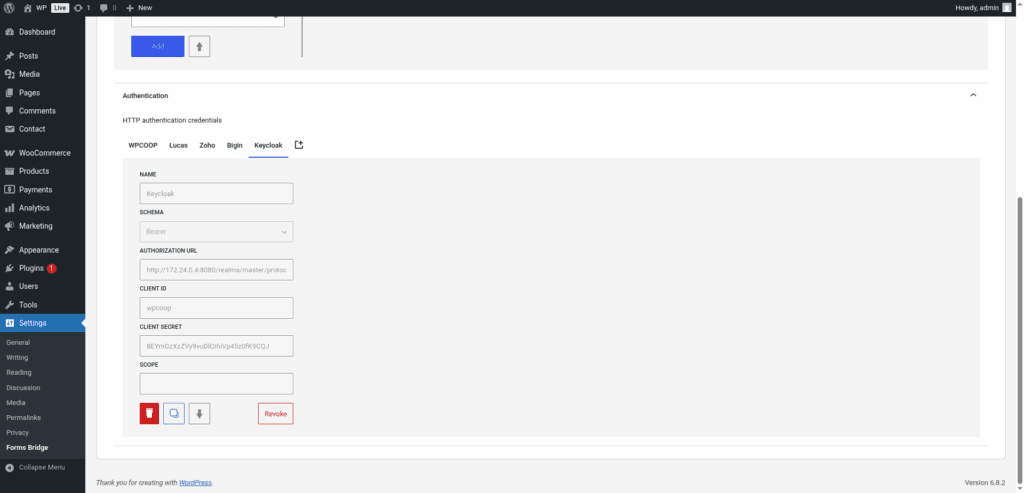
Once your OpenID Connect client is set up, you can proceed to configure the Posts Bridge in your WordPress admin page. Navigate to Settings > Posts Bridge > HTTP > Authentication and register a new OAuth credential.
To set up the credential you have to specify https://auth.example.coop/realms/master/protocol/openid-connect as the Authorization URL replacing auth.example.coop with the domain of your Keycloak server, and master with the name of your Keycloak realm.
The Client ID is the name of the client you’ve registered on the previous step, and the Client secret is the secret you’ve copied from the client’s credential tab. The Scope field is optional and depends on your client configuration.
Once registered, Posts Bridge will allow you to Authorize the new credential. Click on the button and a new browser’s tab will be opened with the Keycloak login page.

Fill this form with the user name and password you’ve been created for this purpose. After that, you will be redirected again to the HTTP tab of the plugin settings page with your credential authorized.
Bridge your posts
With your OAuth credential authorized, you can now attach it to your custom backend and use this backend on your bridges. Posts Bridge will use the access token and refresh token issued by Keycloak to perform authentication requests against its API.