
WordPress
If you are using Posts Bridge, you already know WordPress, no presentation is needed.
The WordPress add-on allows you synchronize posts between two or more WordPress sites. The add-on also can be used to easily migrate content from site to site.
The add-on
The WordPress REST API provides an interface for applications to interact with your WordPress site by sending and receiving data as JSON (JavaScript Object Notation) objects. It provides data access to the content of your site, and implements the same authentication restrictions.
A WordPress bridge will use the WordPress REST API to fetch posts from a remote site and seamlessly synchronize them with the local posts collections.
With Posts Bridge introspection API you’ll be able to inspect your remote WordPress post fields to easily map them to your local post fields and taxonomies.
How to use
The first step to use the add-on is to activate it in the add-ons table in the general settings tab.
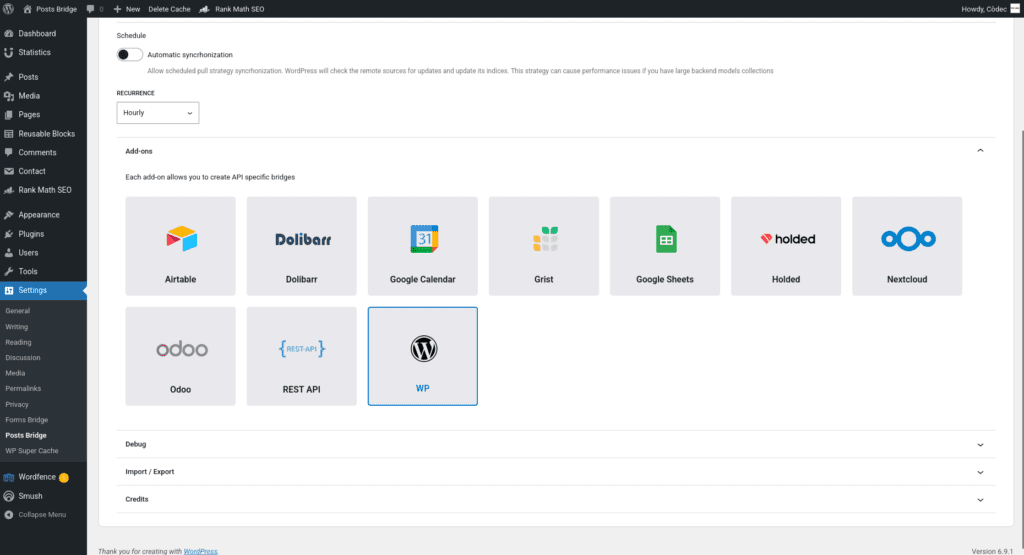
Once activated, a new tab named WordPress will be visible in the settings page. If it’s your first time, it should looks like this:
Bridge set up
A WordPress bridge will require the following components:
1. Credential
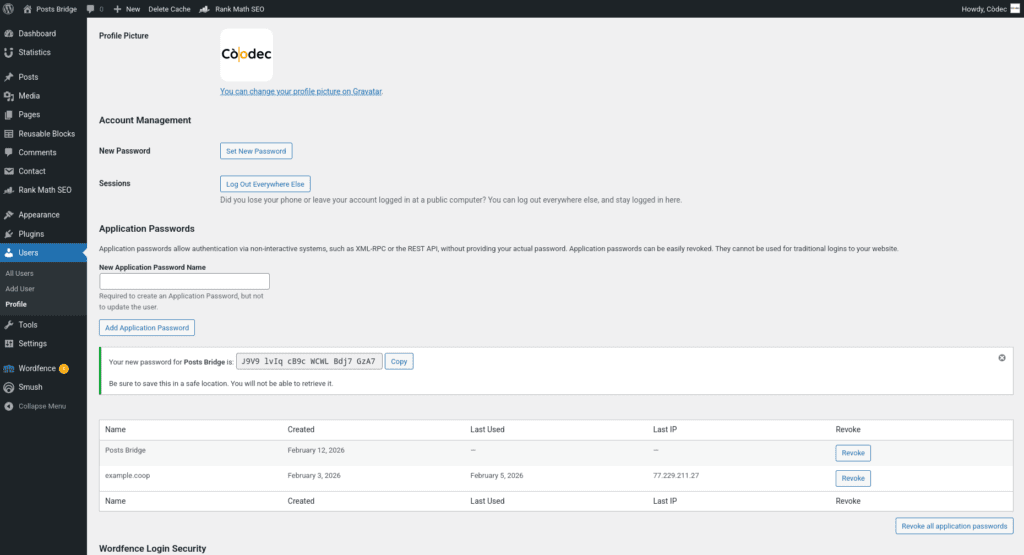
The WordPress REST API provides data access to the content of your site, and implements the same authentication restrictions. To solve this API authentication requirement, the add-on requires you to register a Basic type of credential with a user login and an application password.
Application passwords are a WordPress feature that lets you generate revocable, per-application credentials for programmatic access. They are designed to avoid sharing your main account password with third-party tools.
You can generate this password from the user profile of your WordPress site. The password requires a name (e.g. Posts Bridge).
Once you have the user login and the application password, you have to go to Settings > Posts Bridge > HTTP > Authentication and register a new authentication credential.
Select Basic as the authentication schema and put the user login as the Client ID and password as Client secret fields. In addition, the credential will require a unique name to identify it.
2. Backend
To configure the WordPress REST API as a backend, follow this steps:
- Register a new backend with a unique name (MySite REST API, for example), and a URL with your site base URL as value (e.g.
https://example.coop). - Select the Basic credential you’ve configured on the previous step.
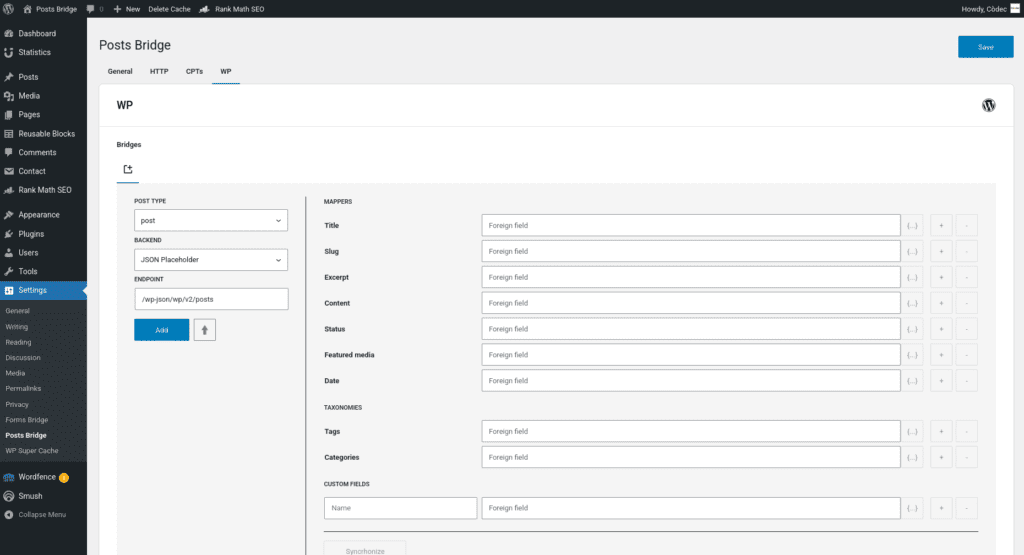
3. Post type
Posts Bridge allows you to bridge any registered post type from your WordPress site. If you’ve not registered it yet, you can register it with Posts Bridge. Go to the CPTs tab and create a new custom post type. The registration form will inherit the registration defaults, but you can modify its values at any time. The only required fields are Name, Label and Singular label.
4. Bridge
The add-on’s bridge is an extension of the generic REST bridge with some predefined defaults. Like the REST bridge, the add-on’s bridge requires a post type, a backend, and an endpoint.
The endpoint of a WordPress bridge should be like /wp-json/wp/v2/{post_type}. The post_type parameter is the name of the remote post type you want to get synchronized.
You can map different post types in a bridge. For example, you can map the standard post from the remote site to a custom post type, like news, in the local site.
Troubleshooting
To troubleshooting your bridges you can use the plugin’s debug console from the General Settings page. Enable the debug mode and submit a sample form response to see what’s going on under the hood.
Common issues
- Authentication failures
- Verify you’re using application passwords
- Verify user login
- Missing data
- Verify field mappings
- Check available post meta
- Check available taxonomies